Happy Sunday! We had SUCH a great week and learned so much,
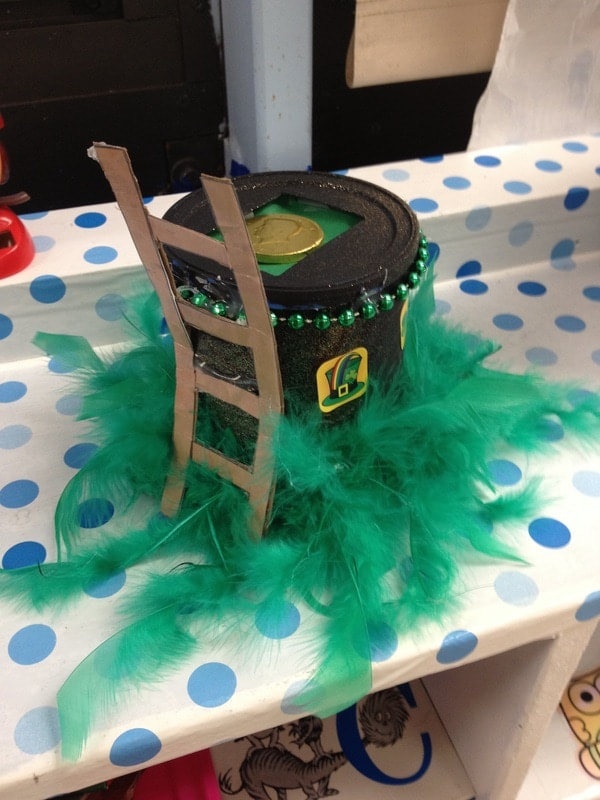
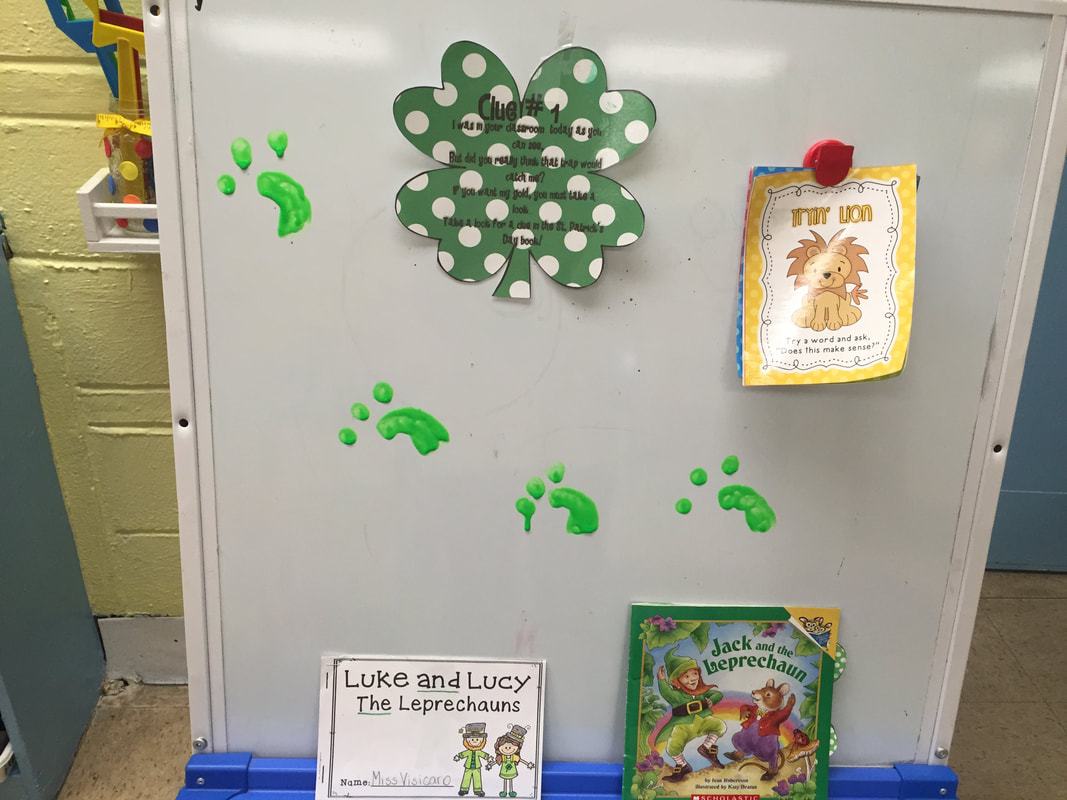
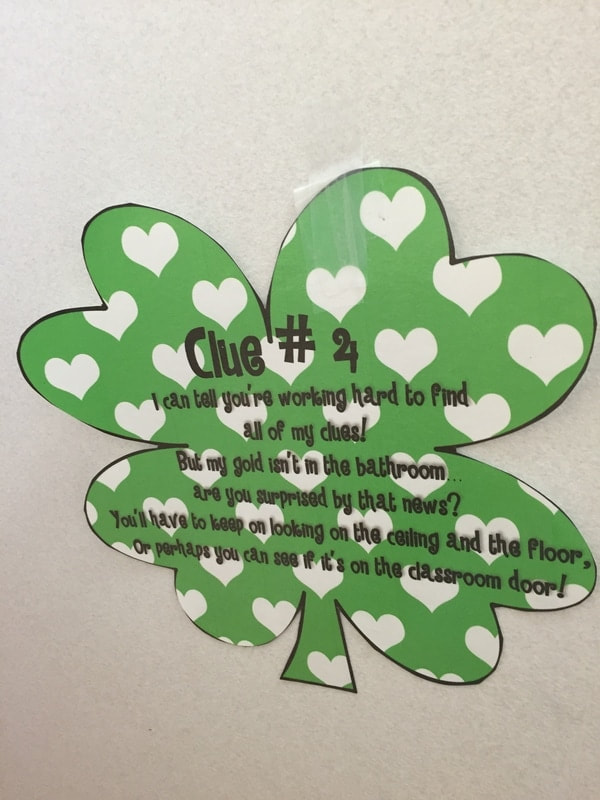
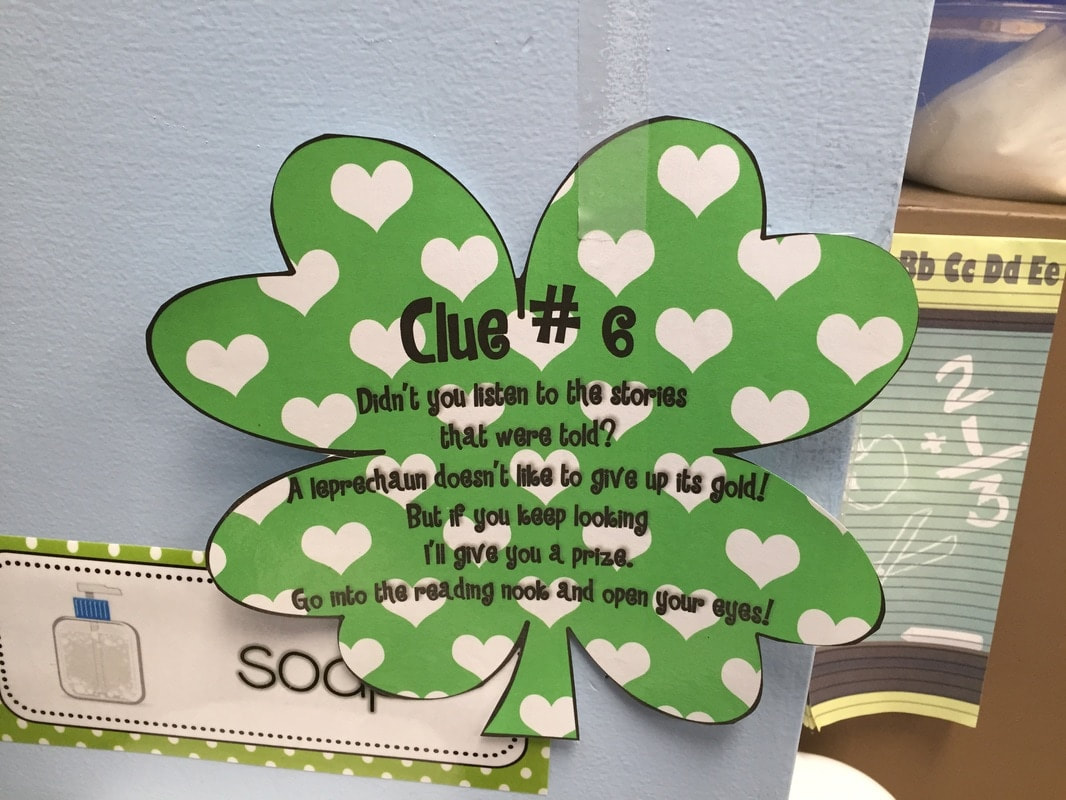
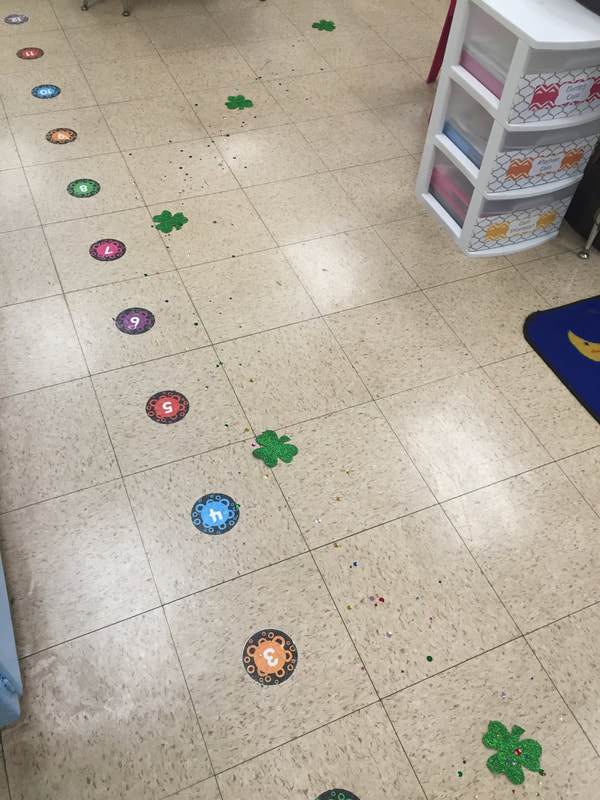
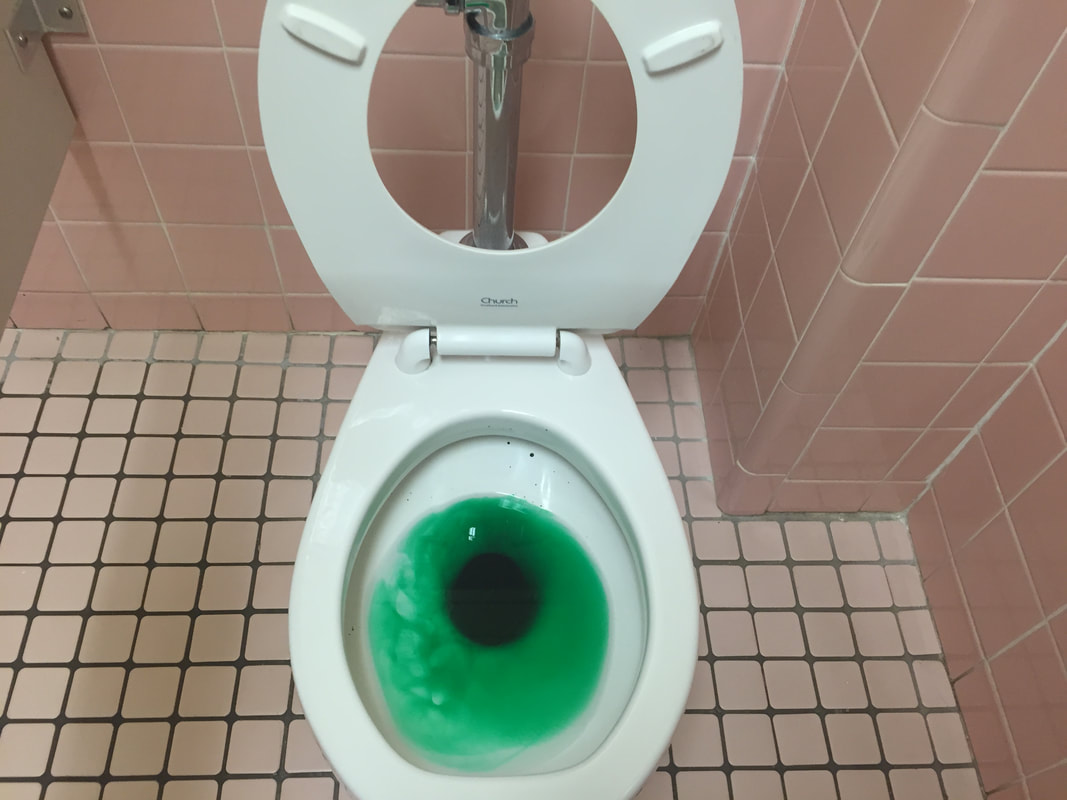
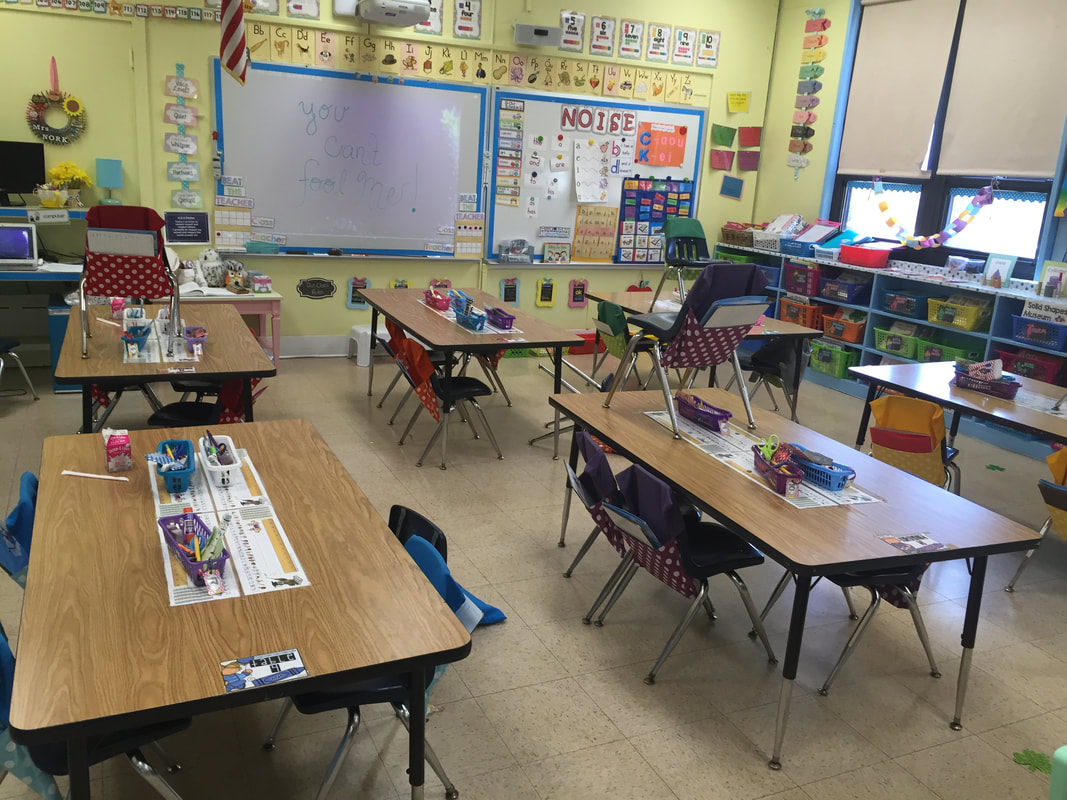
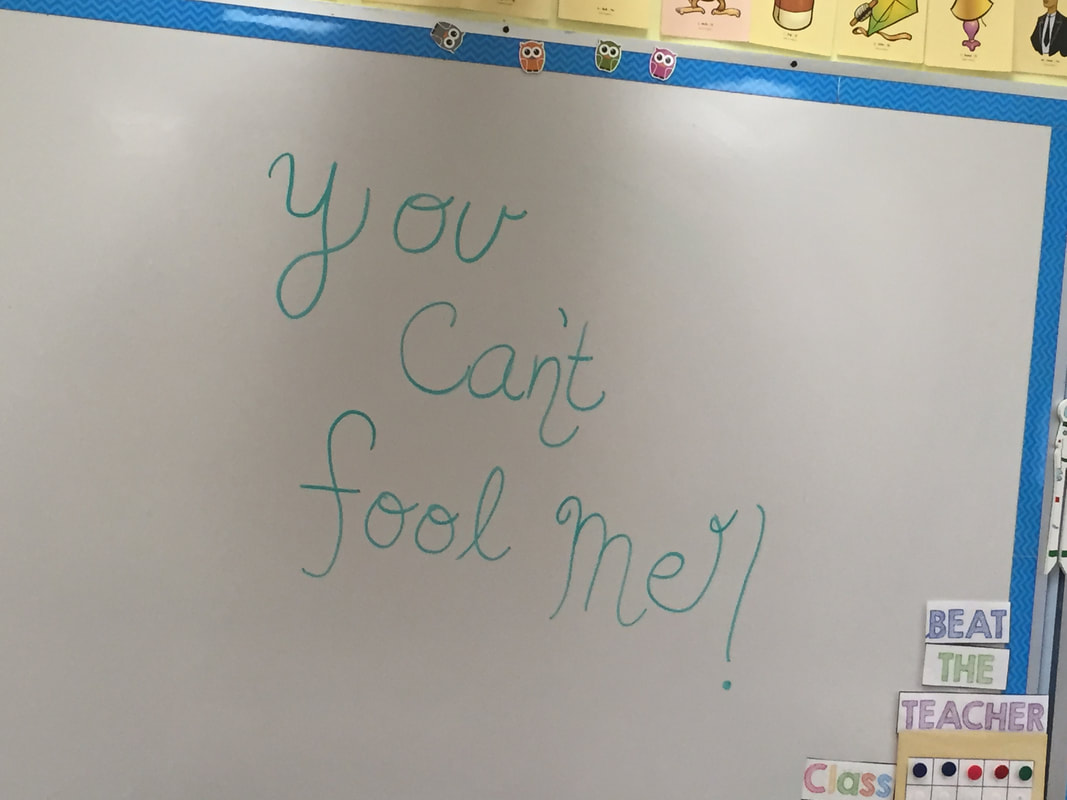
Let's start with St. Patrick's Day (it's my absolute favorite time of the year)! I just love watching the excitement in the children's eyes! First, we set up a trap to catch the Leprechaun. We used a coin as bait :) I put green food coloring in the toilet bowls, sprinkled shamrocks and glitter all over the floor, knocked over some chairs, and tracked green footprints all over the walls. The room looked a mess!! I also left the coin on our trap to make it look like the Leprechaun was not fooled by our trap. When the kids walked in the room, the screaming began! After I settled them down a bit, we began our scavenger hunt which led us to a basket of green sunglasses and gold coins. Even though the children did not "catch" the Leprechaun, they were excited to receive the toys as a prize! Take a look at our fun-filled day below!
Let's start with St. Patrick's Day (it's my absolute favorite time of the year)! I just love watching the excitement in the children's eyes! First, we set up a trap to catch the Leprechaun. We used a coin as bait :) I put green food coloring in the toilet bowls, sprinkled shamrocks and glitter all over the floor, knocked over some chairs, and tracked green footprints all over the walls. The room looked a mess!! I also left the coin on our trap to make it look like the Leprechaun was not fooled by our trap. When the kids walked in the room, the screaming began! After I settled them down a bit, we began our scavenger hunt which led us to a basket of green sunglasses and gold coins. Even though the children did not "catch" the Leprechaun, they were excited to receive the toys as a prize! Take a look at our fun-filled day below!
In Fundations, I explained that when the /k/ sound is followed by the letters a, o, or u, the letter "c" is used (cat, cot, cut). Whenever the /k/ sound has an e or i after it, the word is spelled with a " k " (kit, kid). If you would like to practice this tricky skill with your child, I've included my powerpoint slides below :)
| c_or_k.pdf |
The kiddos also learned two new Trick Words: as and has.
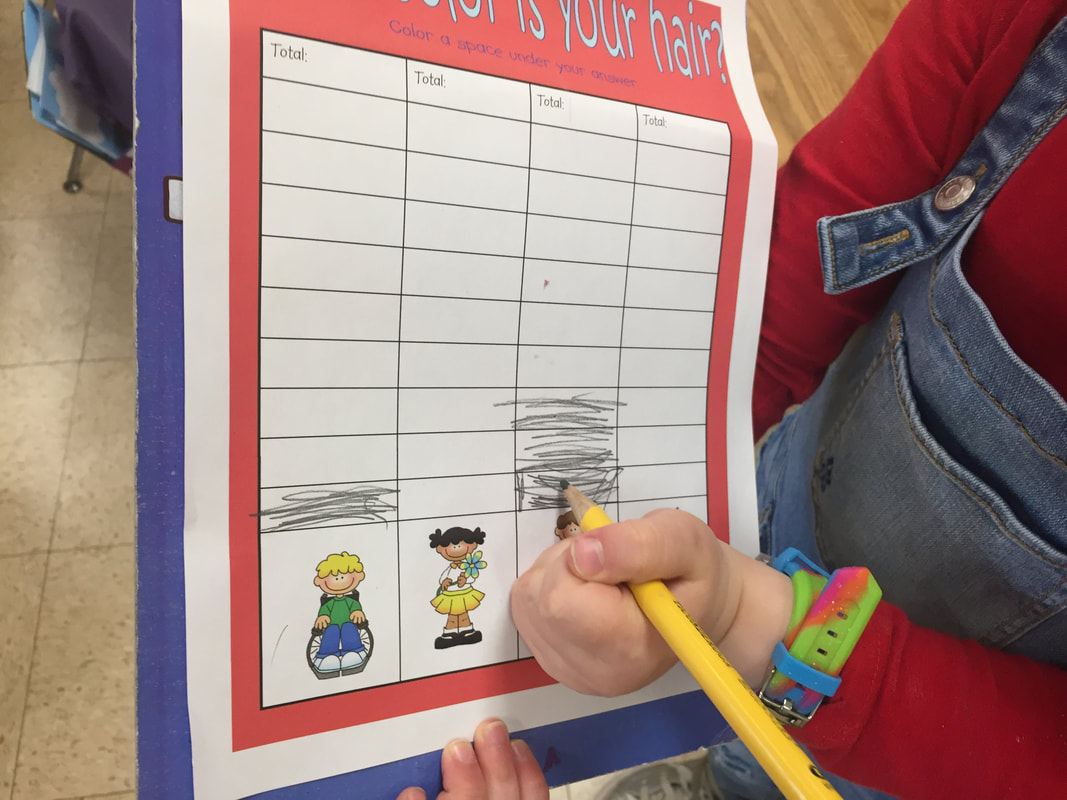
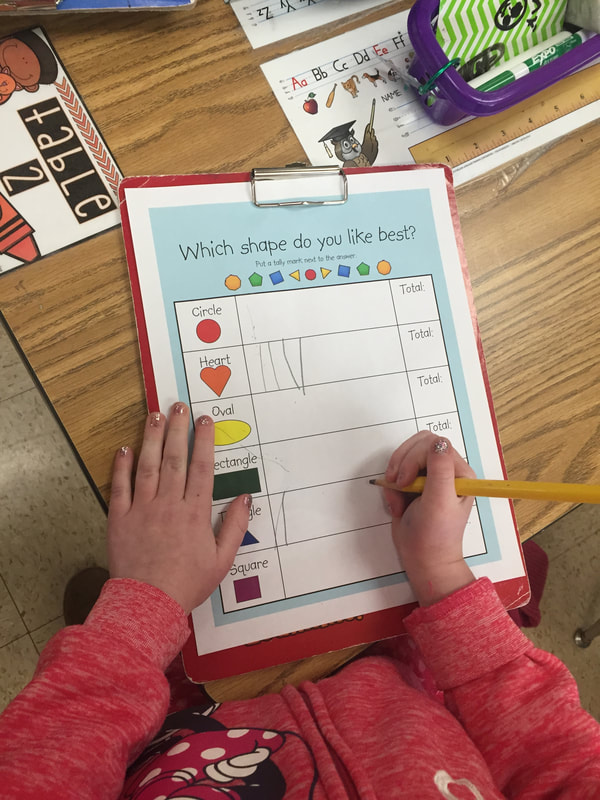
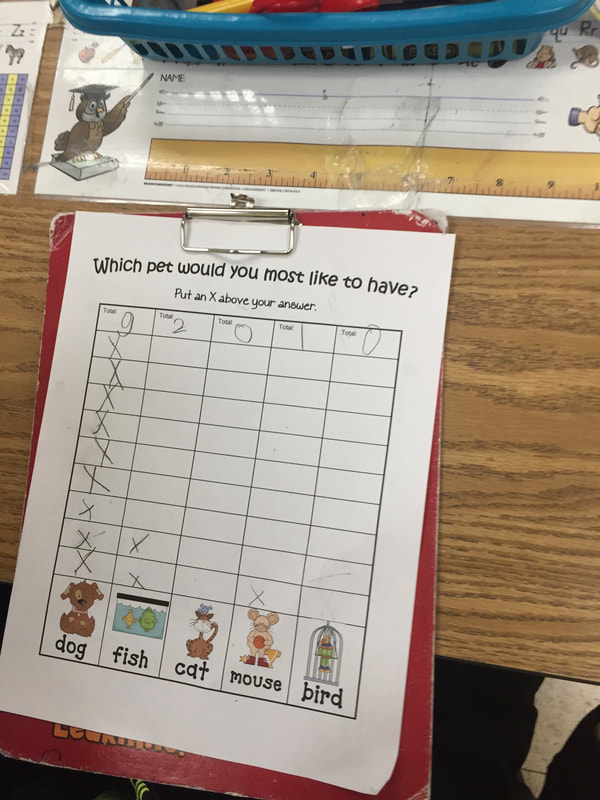
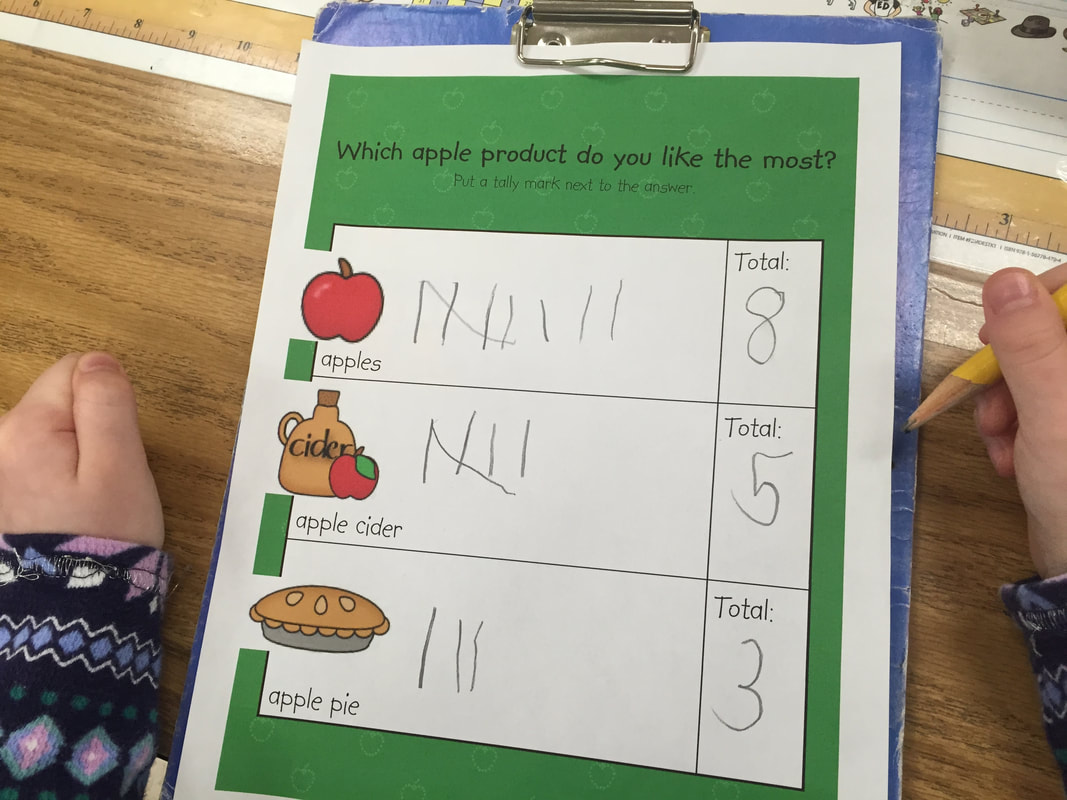
In Math, the children learned more about each other by conducting surveys with a partner. Each partnership had a different survey question and walked around with a clipboard to record their classmates responses. The children LOVED this!
In Math, the children learned more about each other by conducting surveys with a partner. Each partnership had a different survey question and walked around with a clipboard to record their classmates responses. The children LOVED this!
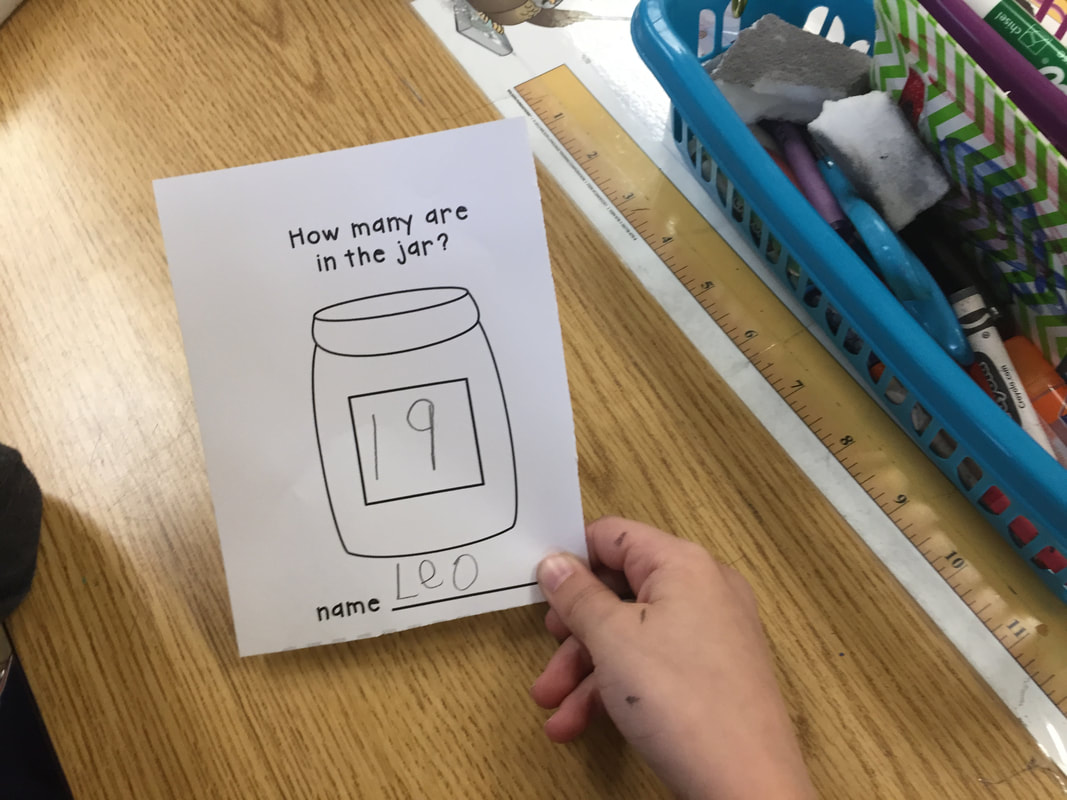
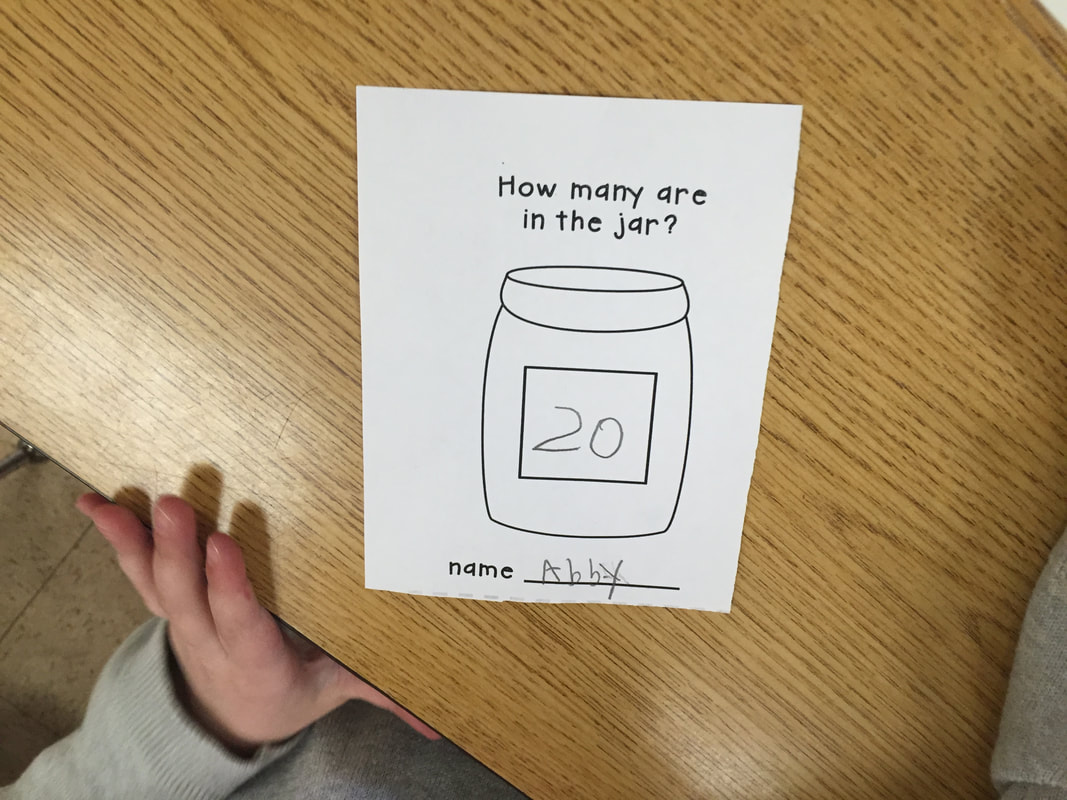
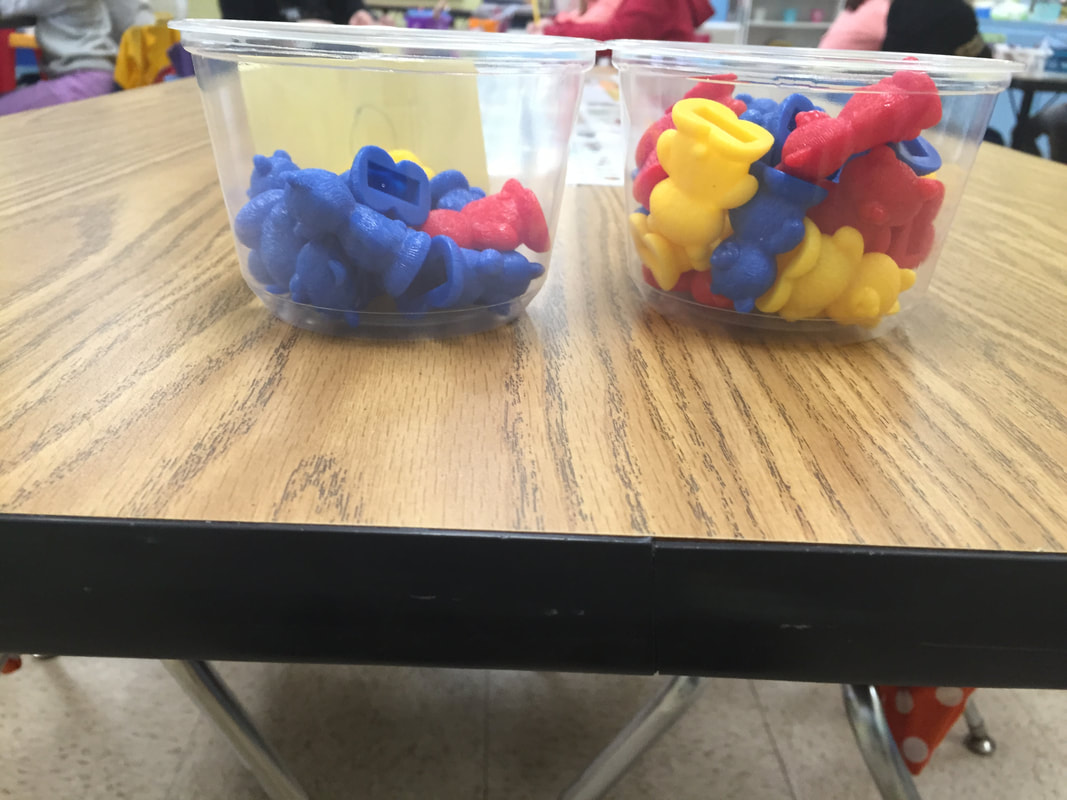
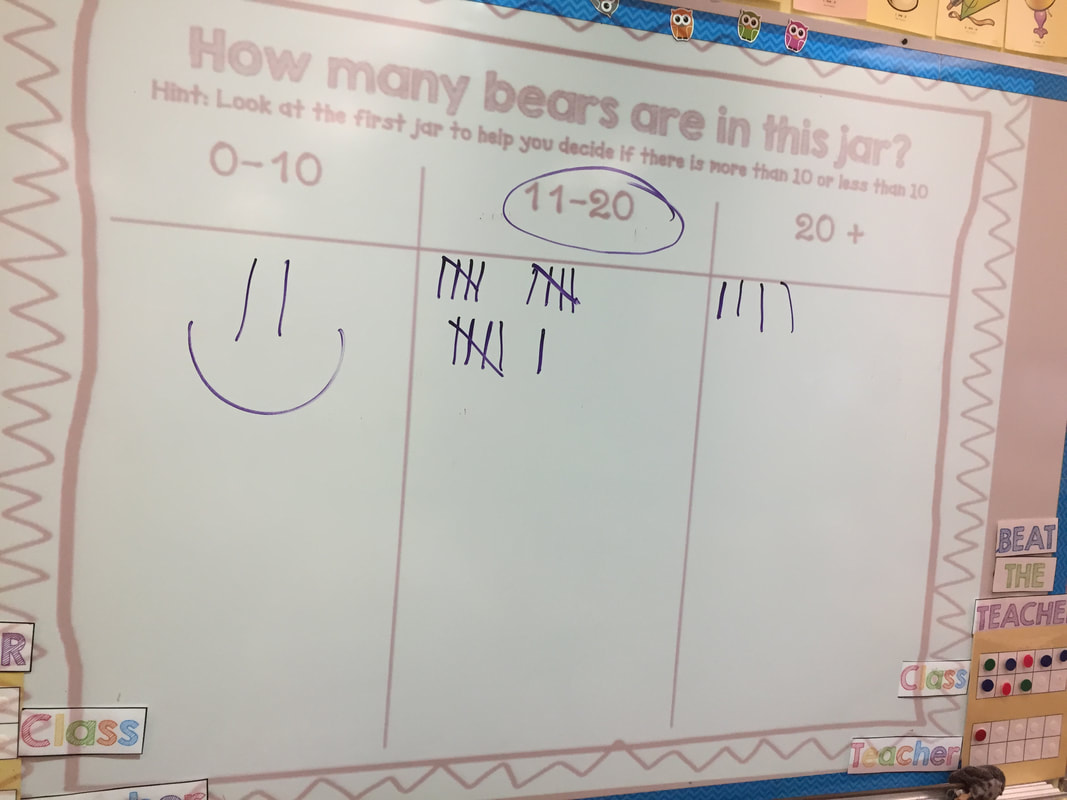
The next day, we did some estimating. I explained that they did not need an exact answer and would use a reference jar to help them estimate. I showed the children the reference jar with 10 objects. Together, we counted the objects and labeled the jar with the number 10. Next, I showed the estimation jar with 20 objects.
I gave the children time to look closely at the two jars and passed out a estimation sheet to each child and asked them to record how many objects they thought were in the estimation jar.
Next, we counted the objects in the estimation jar and discussed the terms much too high, much too low, and pretty close. I asked the children which of these would describe their estimates and why.
Take a look at the estimation powerpoint I created to go along with this lesson:
| estimation_powerpoint_.pdf |
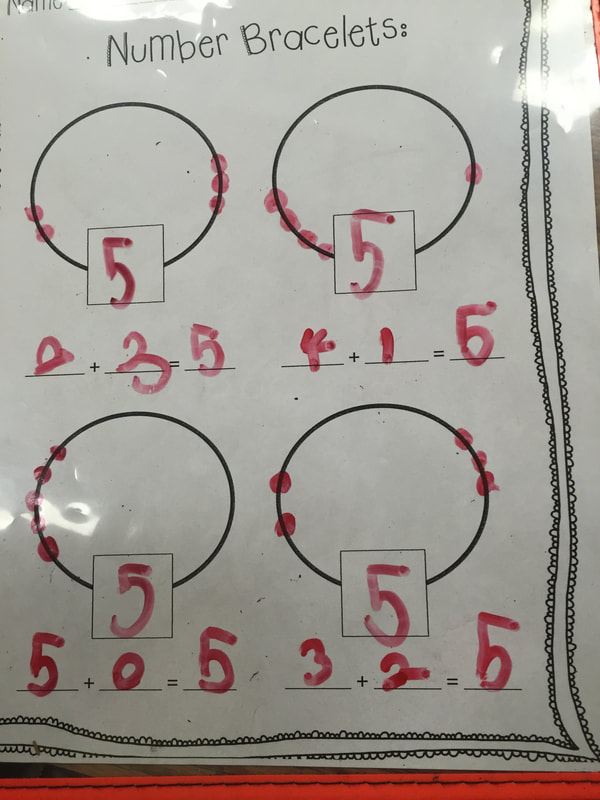
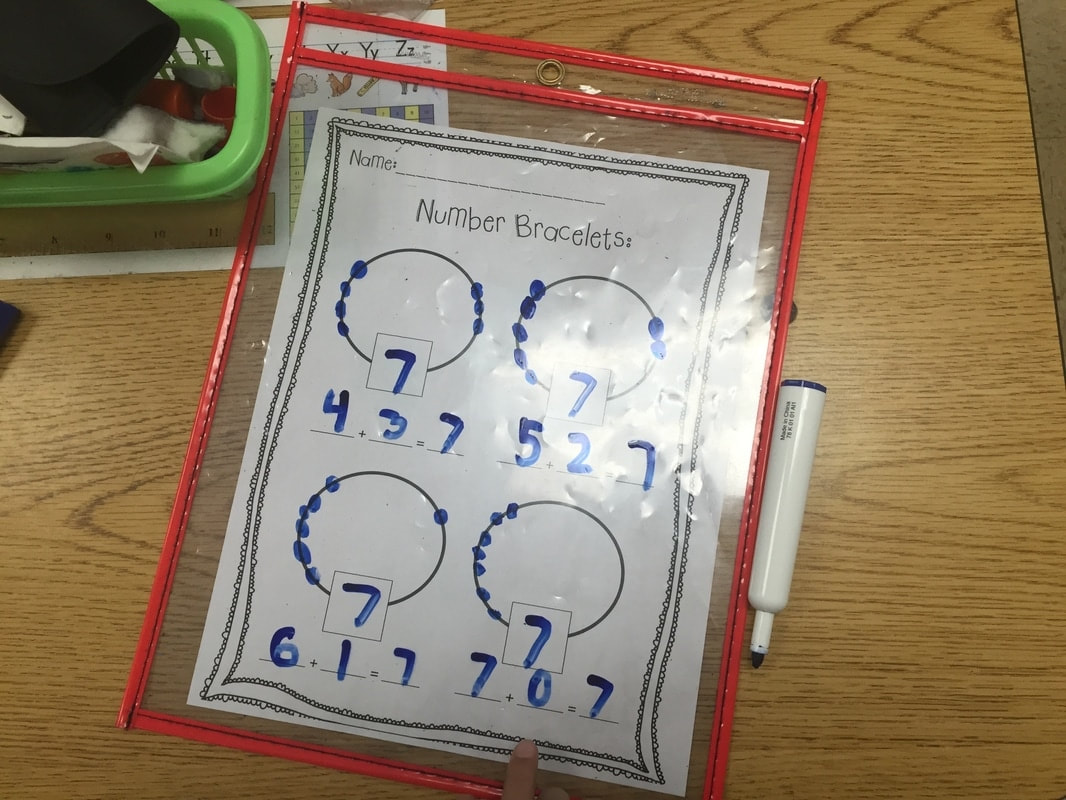
The next day, we made Number Bracelets using pipe cleaners and pony beads. Each student had either 5, 6, 7, or 8 beads on their bracelet. I demonstrated how to move the beads around the loop to show different ways to make their number. The children recorded their combinations on their recording sheet and wrote each corresponding number sentence.
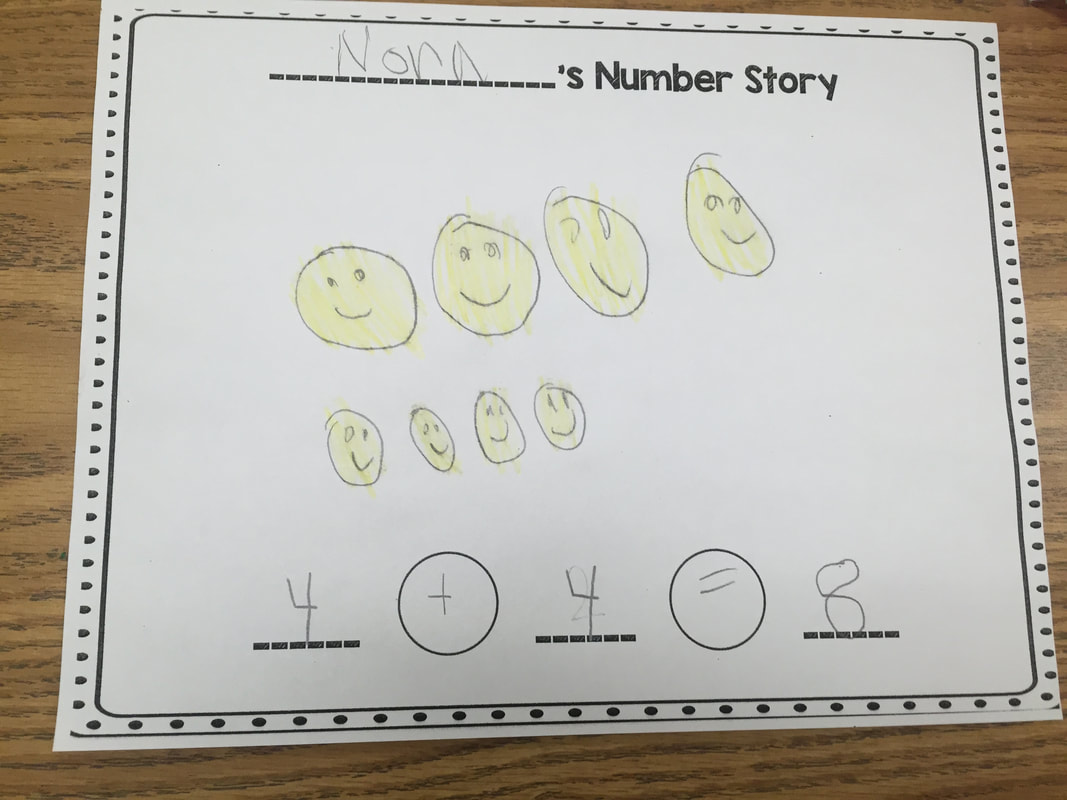
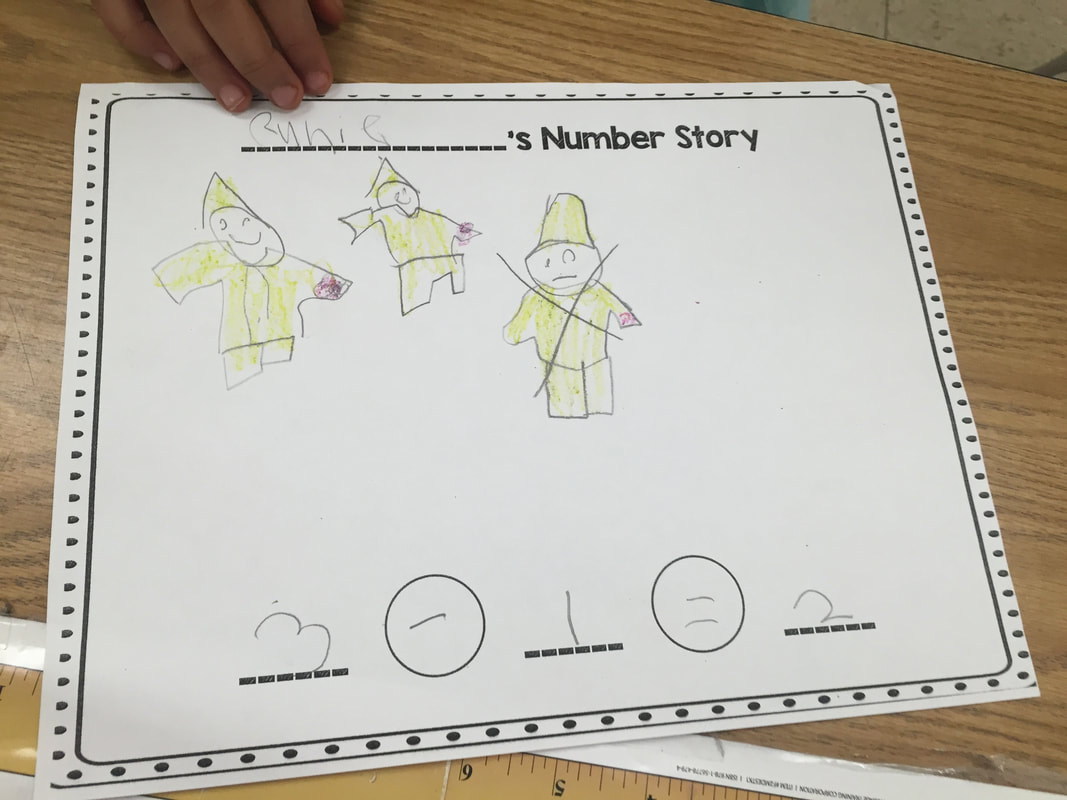
Finally, I told a few "join" and "take away" number stories and asked the kiddos to help solve the number stories by drawing a picture on the board.
Next, we reviewed a variety of strategies, such as using our fingers, drawing a picture, counting on or back, and using a number line or grid. We also wrote number sentences to go along with each number story.
Finally, the children created their own number story for a class book. They did a great job!
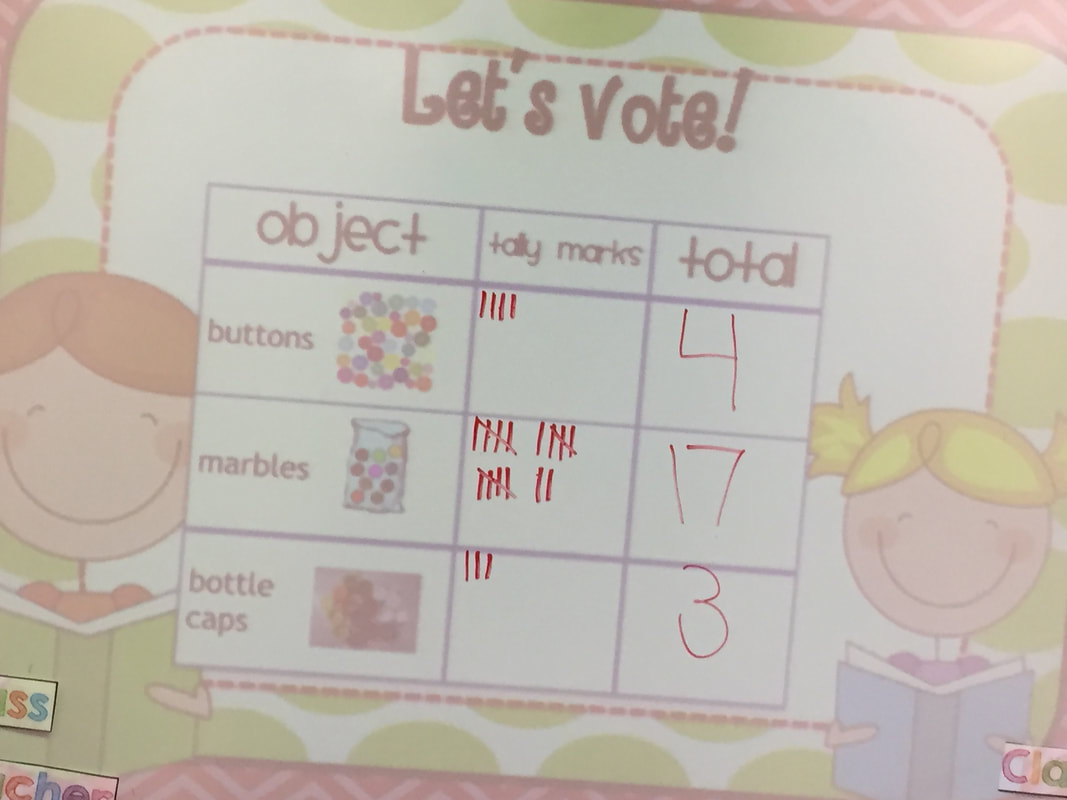
Finally, I introduced our class collection jar. I asked for children's ideas about what they would like to collect as a class (bottle caps, buttons, etc). Then, the children voted to decide which item to collect. Marbles had the most tally marks in both classes! I told the children that they would bring in their chosen item for the next week. As the collection accumulates, we are going to count how many items are in the collection. Each time the collection is counted, we will record the date, the number of new items and the total number of items on a class chart. I also explained to the children that they are not to go out and buy marbles at the store. I explained that if they had some at home, they can bring them in. They do not need to bring in any marbles if they do not have them at home.

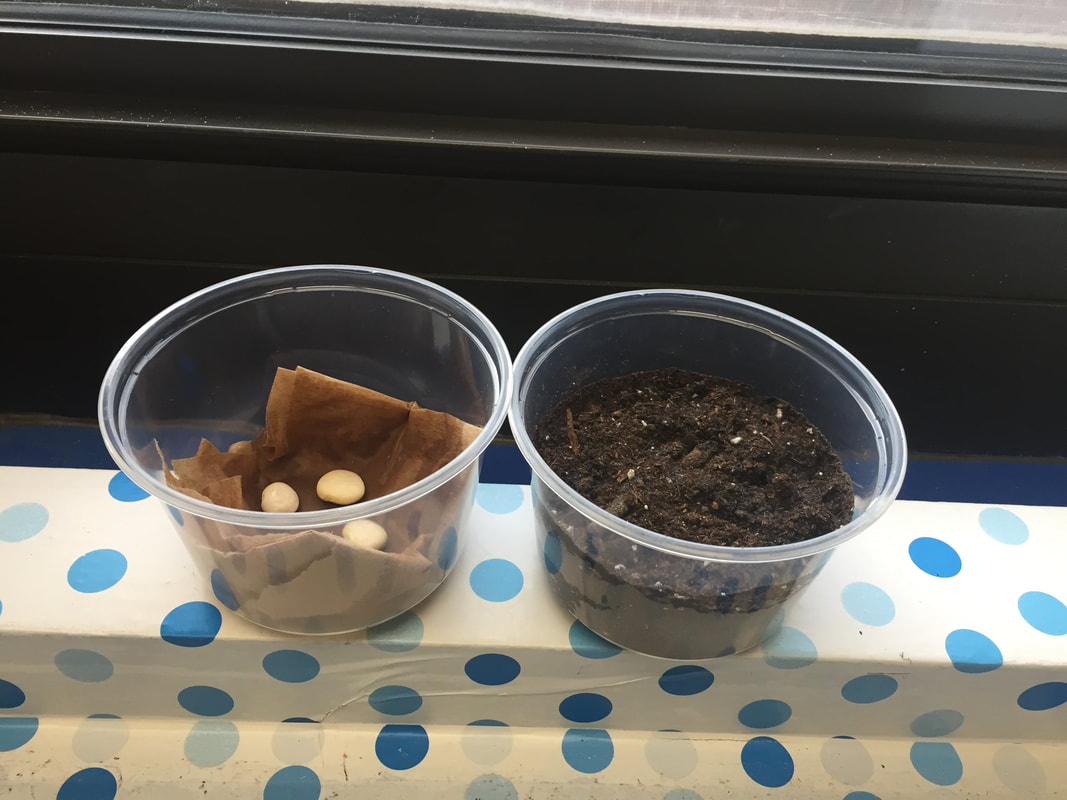
In Science, we planted lima bean seeds and nasturtium seeds. The children learned that seeds need 5 things to grow: sun, water, soil, space, and air.
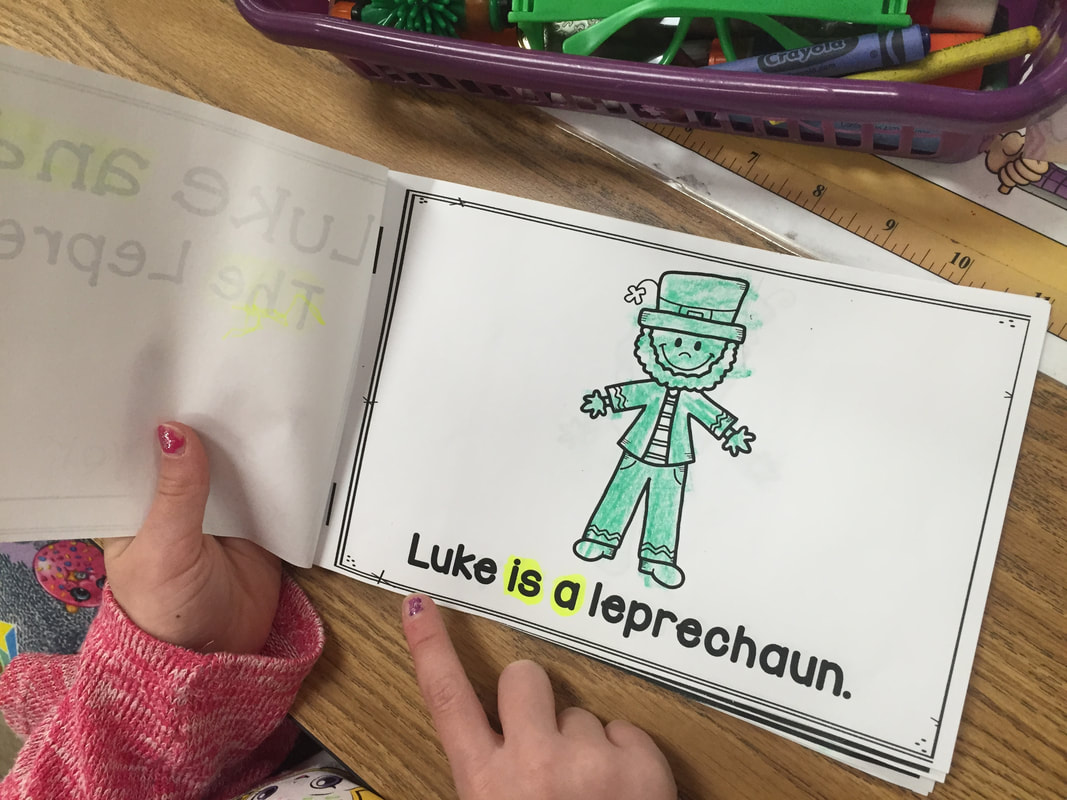
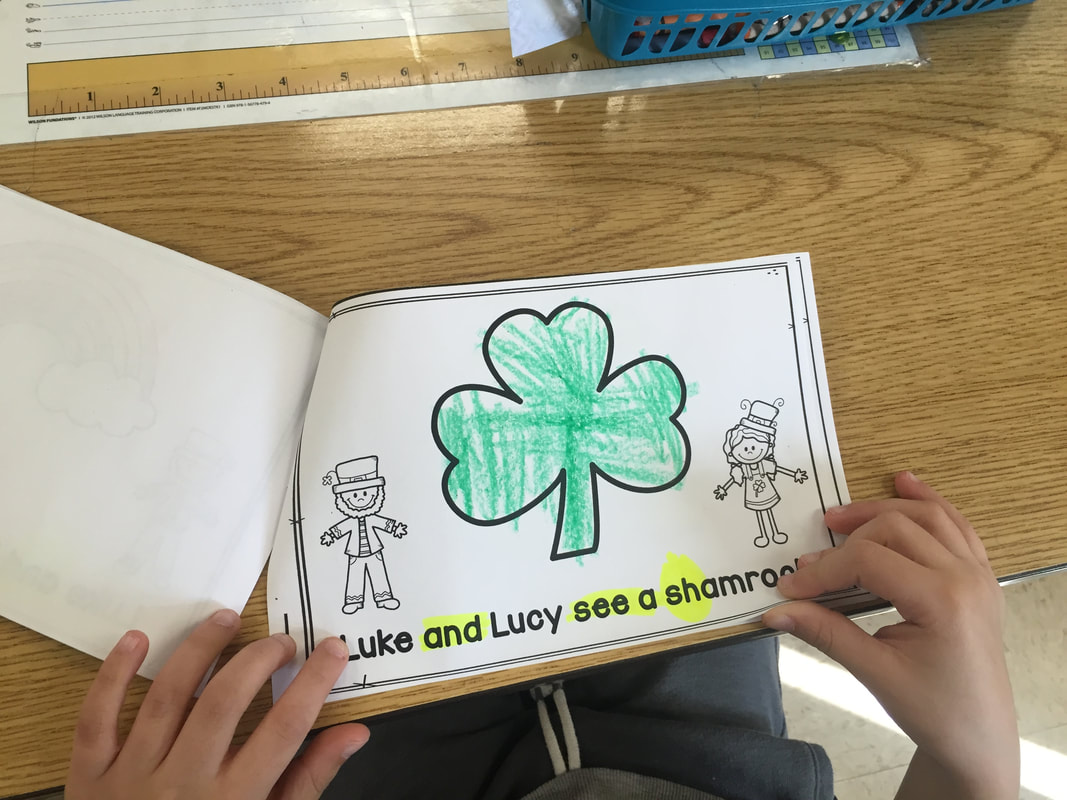
During Literacy, the children choral read "Luke and Lucy The Leprechauns" and learned about the "Sh" sound. They also highlighted the sight words on each page.
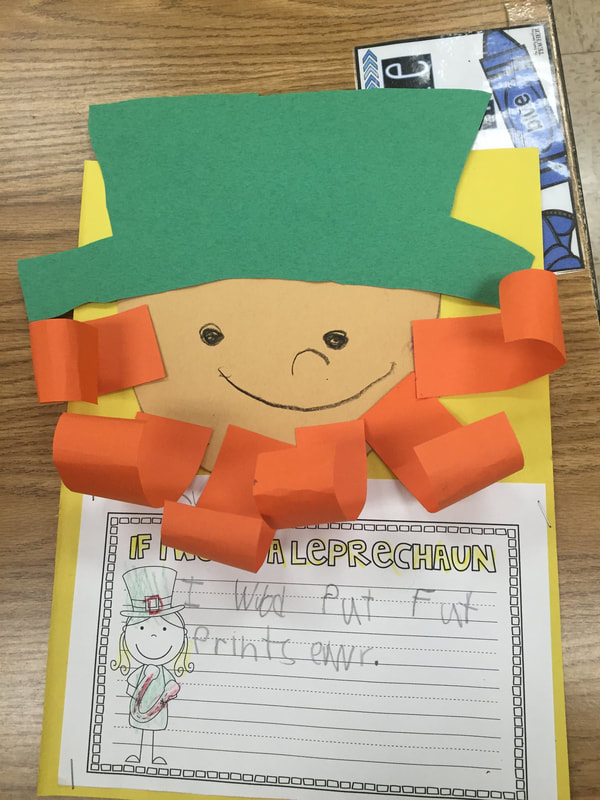
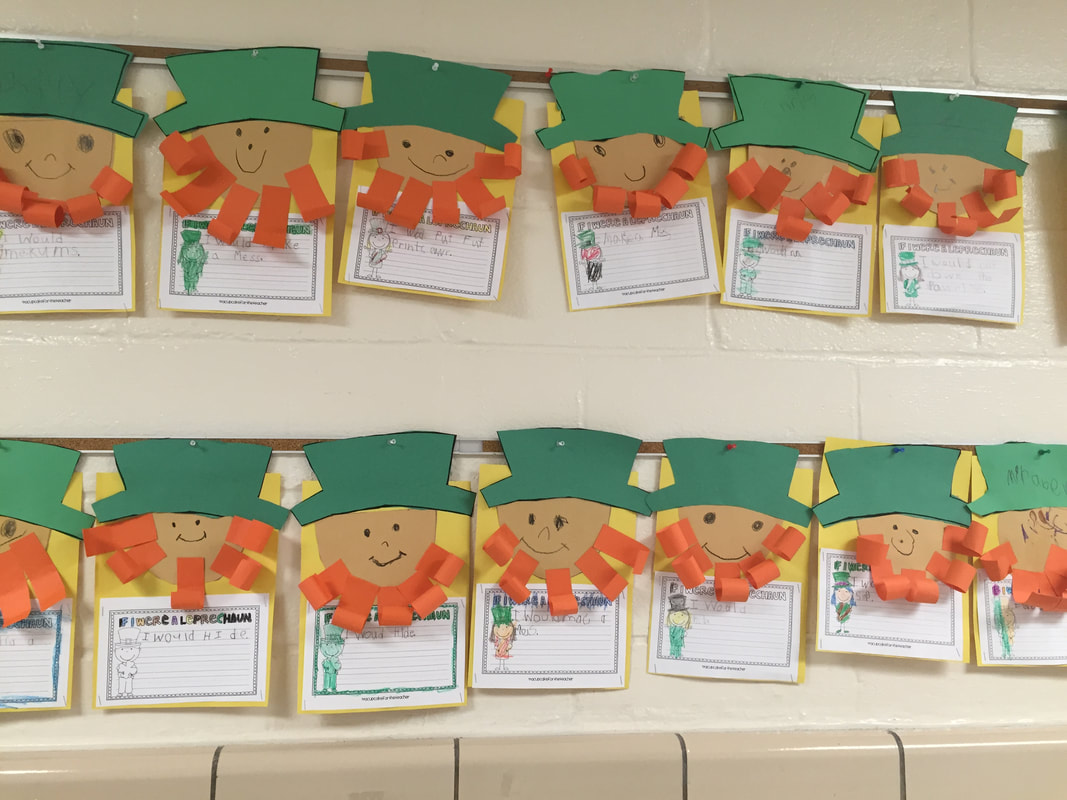
Finally, the children completed the writing prompt"If I were a Leprechaun... "
Then, the children created their Leprechaun face. They came out super cute and the children are very proud of them!
Then, the children created their Leprechaun face. They came out super cute and the children are very proud of them!
During Reading, we began our unit on nonfiction books. The children learned that nonfiction books have real information. Nonfiction books often have photographs of real people and things rather than drawings. The kiddos learned that the title page includes the publisher or the company that made the book and the table of contents lets readers know the information that is in the book and the page where they can find it. We read two books this week titled "Doctor's Help" and "A Day in the Life of a Zookeeper." The children learned why doctors are important to our community and what a zookeepers job entails. We also spent some time comparing and contrasting the two books and making connections to our own lives. Finally, the kiddos learned 4 new vocabulary words: healthy, unhealthy, weak, and care for.
During Writer's Workshop, I explained that writers of how-to books often write a special page to introduce their books to help their readers understand the topic. How-to writers often pretend that the people who will read their book have never even heard of the topic, and then they write an introduction page to give the readers some information or facts so that the rest of the how-to book will make sense. When the children sat down to write, I was very impressed to see that many of them added introductions :)
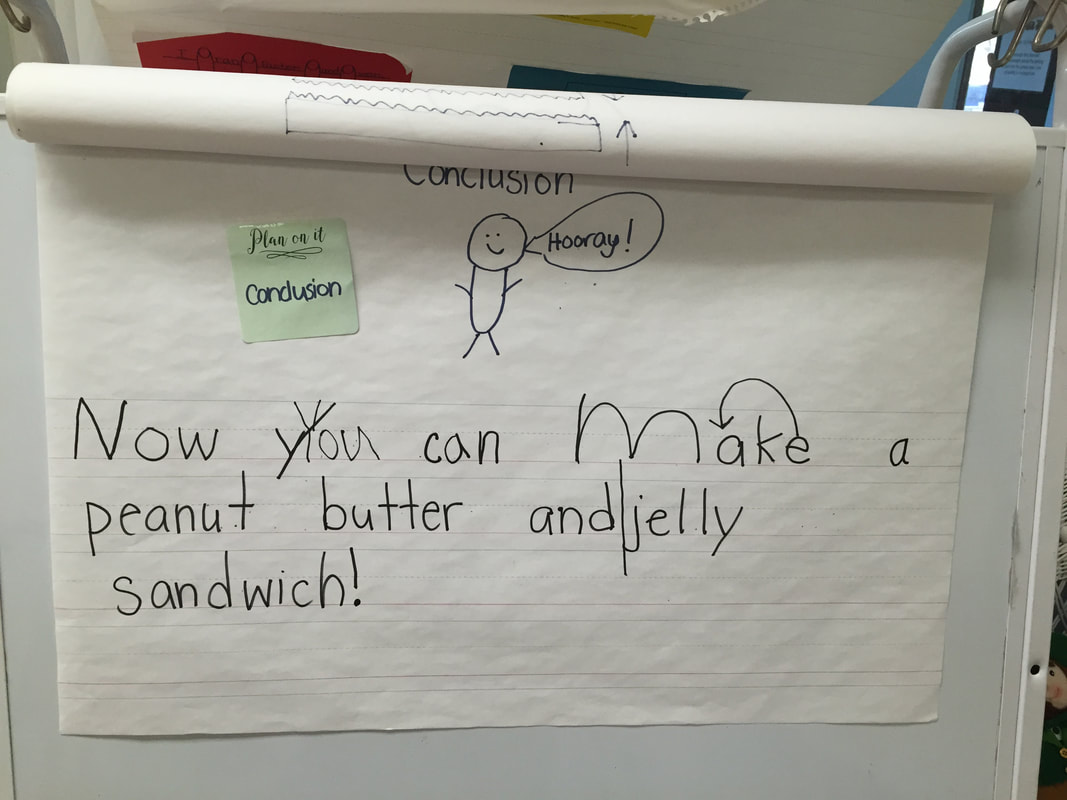
The next day, I explained that in order to make our writing easy to read, we need to include a capital letter at the beginning of each sentence, finger spaces in between our words, punctuation at the end of each sentence and pictures that match our words. The children helped me write a conclusion to our peanut butter and jelly sandwich how-to book by using everything they know about being a good writer. We used our word wall to spell sight words correctly, we used a "spaceman" to make sure we had spaces between our words, and we made sure only the first letter of our sentence started with a capital letter. We edited our work at the end to make sure everything was perfect!! Take a look :)
During Writer's Workshop, I explained that writers of how-to books often write a special page to introduce their books to help their readers understand the topic. How-to writers often pretend that the people who will read their book have never even heard of the topic, and then they write an introduction page to give the readers some information or facts so that the rest of the how-to book will make sense. When the children sat down to write, I was very impressed to see that many of them added introductions :)
The next day, I explained that in order to make our writing easy to read, we need to include a capital letter at the beginning of each sentence, finger spaces in between our words, punctuation at the end of each sentence and pictures that match our words. The children helped me write a conclusion to our peanut butter and jelly sandwich how-to book by using everything they know about being a good writer. We used our word wall to spell sight words correctly, we used a "spaceman" to make sure we had spaces between our words, and we made sure only the first letter of our sentence started with a capital letter. We edited our work at the end to make sure everything was perfect!! Take a look :)
During Guided Reading/ Literacy Centers, the children rotated through the following centers:
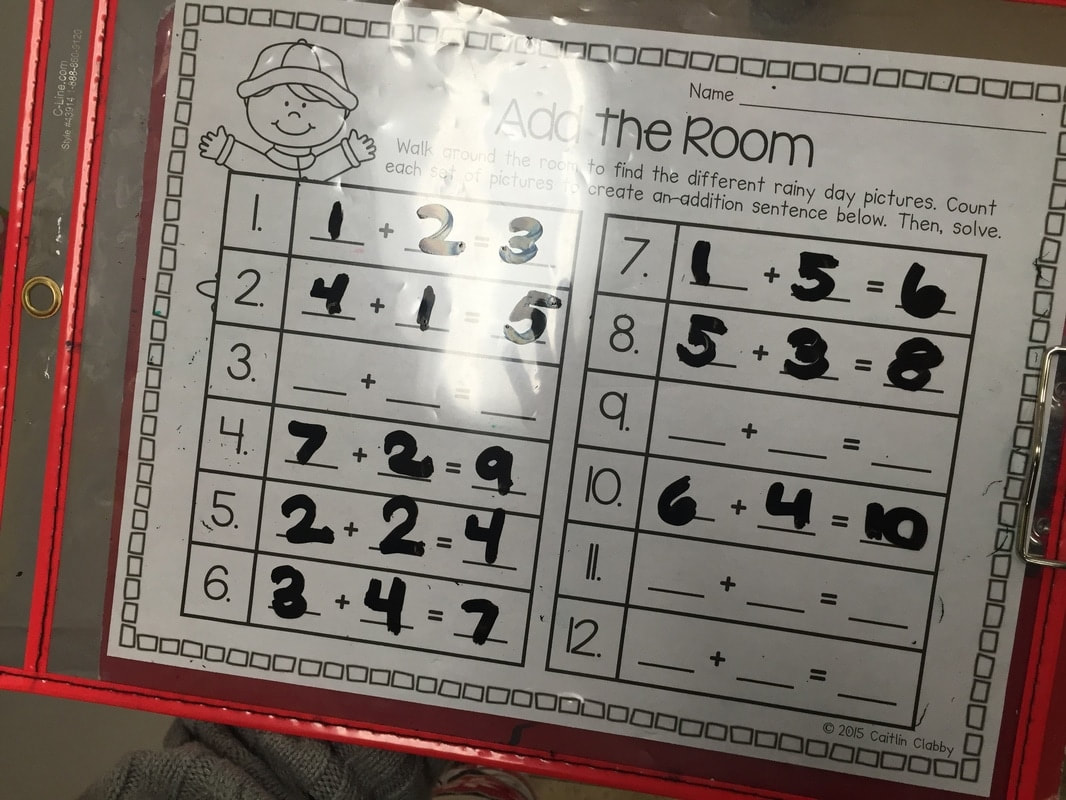
- Add the Room: Children looked for picture cards, counted each group, and wrote an addition sentence on a recording sheet.
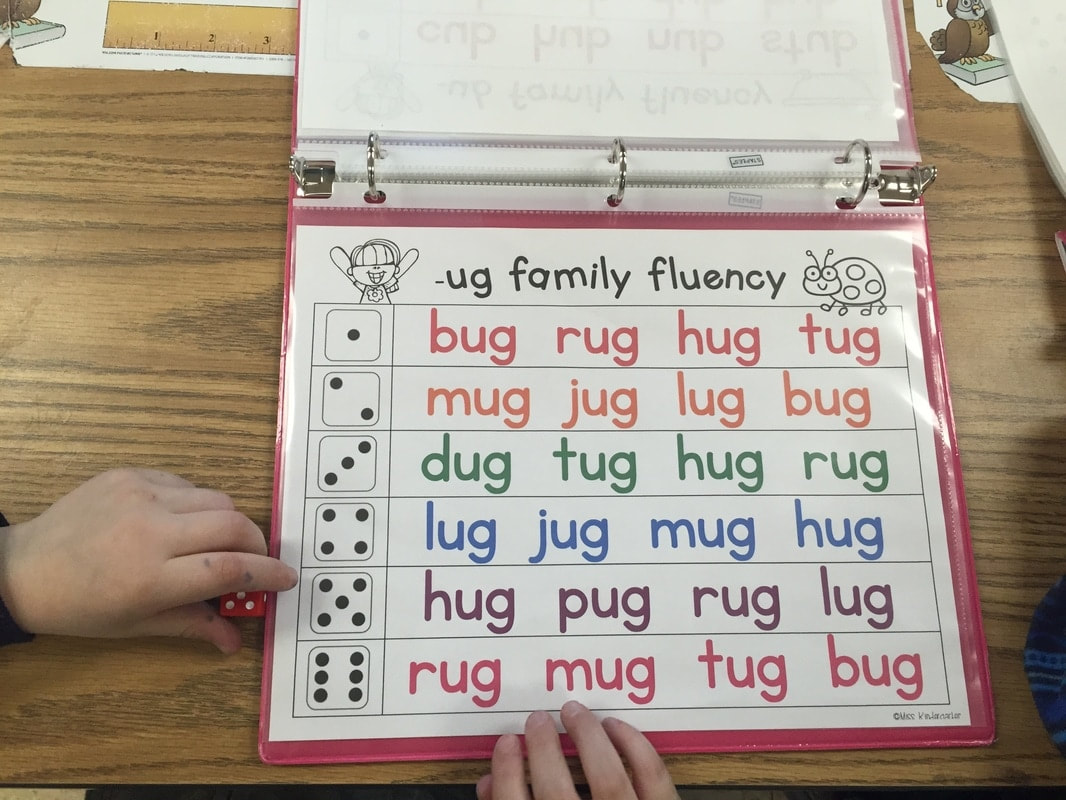
- Word Work Center: Children rolled a die and tapped out the words that matched the number on their die.
- Writing Center: Children worked on their how-to books.
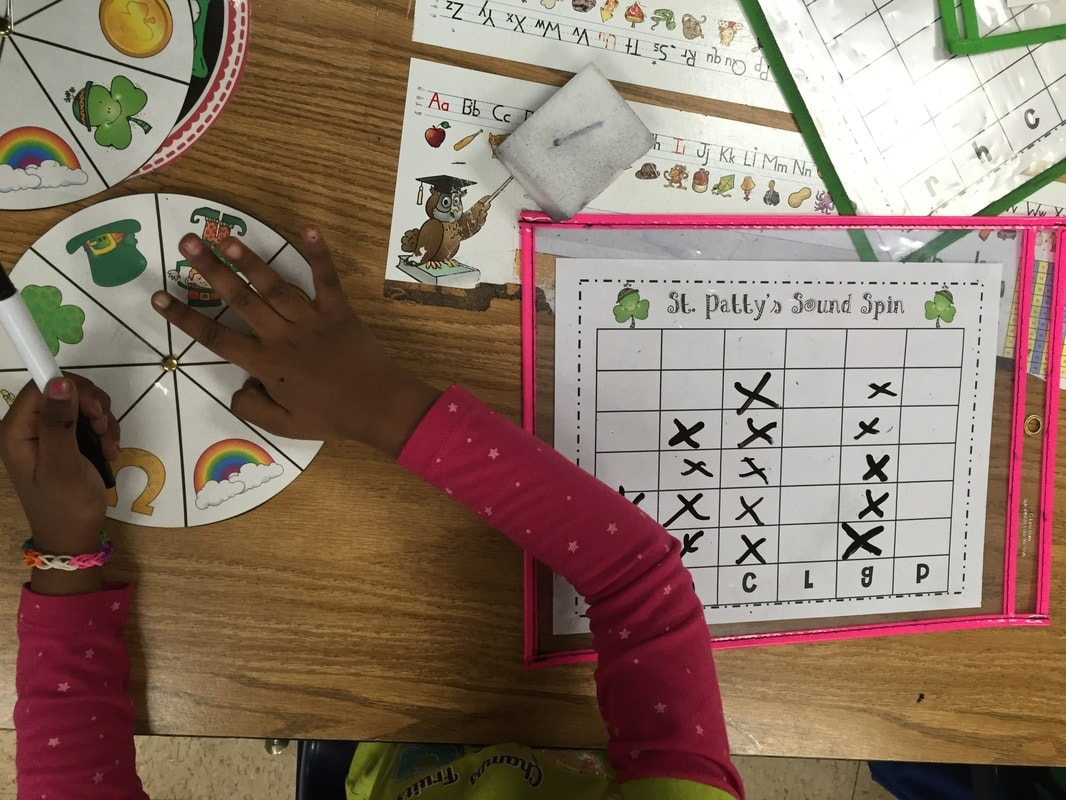
- ABC Center: Students spun their spinner and recorded the beginning sound on their graph.
Well, that about wraps up our week! I hope everyone had a wonderful St. Patrick's Day!!
Have a wonderful Sunday!
Take Care,
Diana Nork
Have a wonderful Sunday!
Take Care,
Diana Nork
 RSS Feed
